Unit Four : The Exposure Triangle
Roni Amin, CC BY 2.0, via Wikimedia CommonsBokeh Shapes
Create custom-shaped bokeh by placing a cutout over the lens or using lenses with aperture diaphragms designed for unique bokeh shapes.
Creating different shapes in bokeh involves modifying the aperture in such a way that the out-of-focus highlights take on a specific shape. Here's a general guide on how to achieve this:
Custom Bokeh Shapes:
Select a Lens with a Wide Aperture: Choose a lens with a wide aperture (small f-number) to maximize the blur and emphasize the bokeh.
Create a Bokeh Mask: Cut out a small, precisely shaped mask from a piece of black paper or cardboard. This mask will be placed over the front of your lens and will determine the shape of the bokeh.
Cutting the Mask: Cut a shape out of the center of the mask, leaving a border around it. Common shapes include hearts, stars, or other geometric patterns. Ensure that the mask is small enough to fit easily over the front of your lens.
Attach the Bokeh Mask: Carefully attach the custom bokeh mask to the front of your lens. You can use tape, a lens hood, or a commercially available filter holder that allows for creative aperture inserts.
Set Up Your Shot: Compose your shot and ensure that there are bright, out-of-focus highlights in the background. These could be distant lights, reflections, or any small, bright objects.
Adjust Your Aperture: Use a wide aperture setting (small f-number) to create a pronounced bokeh effect. The custom mask over the lens will cause the out-of-focus highlights to take on the shape you've cut into the mask.
Focus on the Subject: Ensure that your main subject is in focus, and take the shot.
Additional Tips:
Experiment with Different Masks: Try creating and using different shapes to achieve various bokeh effects. The possibilities are limited only by your creativity.
Consider Lighting Conditions: Bright lights or reflections in the background will enhance the visibility of the custom bokeh shapes.
Use a Lens with Rounded Aperture Blades: Lenses with circular aperture blades tend to produce smoother and more natural-looking bokeh.
By customizing your bokeh shapes, you can add a unique and creative touch to your photographs, making them stand out with a distinctive visual style.
Chelsea London © 2015. Fujifilm X-T10 | 35.0 mm | ƒ/2 | 1/1000s | ISO 200 (Multiple images stitched for bokeh panorama)Bokeh Panorama (Brenizer Method)
Use a wide aperture to capture a series of images and then stitch them together to create a panoramic photo with a shallow depth of field.
The Brenizer Method, named after photographer Ryan Brenizer who popularized it, is a photographic technique that involves creating images with an exceptionally shallow depth of field and a wide-angle of view, often mimicking the look of medium or large format photography. This method is particularly useful for achieving a unique and dramatic aesthetic, especially in portrait or environmental photography.
Here's how the Brenizer Method works:
Multiple Shots: Take a series of photographs of your subject using a lens with a wide aperture (small f-number) to achieve a shallow depth of field.
Overlap Shots: Overlap each shot by about 30-50% to ensure there is enough information for stitching the images together seamlessly in post-processing.
Stitching: Use image editing software (such as Adobe Photoshop or specialized panorama stitching tools) to combine the individual shots into a single composite image.
Adjustment: After stitching, you may need to make adjustments to ensure a smooth blend between the images. Pay attention to details like alignment, exposure, and color consistency.
The result is a photograph with a wide field of view and a shallow depth of field that might not be achievable with a single shot, even with a very wide-angle lens. This technique allows photographers to create images with a cinematic or panoramic look while maintaining the subject separation and background blur typically associated with wide-aperture settings.
The Brenizer Method can be particularly effective in situations where a photographer wants to capture a subject in a broader context, such as a portrait with an expansive background, while still achieving a beautiful bokeh and a distinct visual style.
Sean Makin © 2015. Nikon D610 | 16.0 mm | ƒ/8 | 1/20 | ISO 100 (Five images stacked)Sean Makin © 2023. Nikon D610 | 16.0 mm | ƒ/8 | 1/6 | ISO 100 (Two images stacked)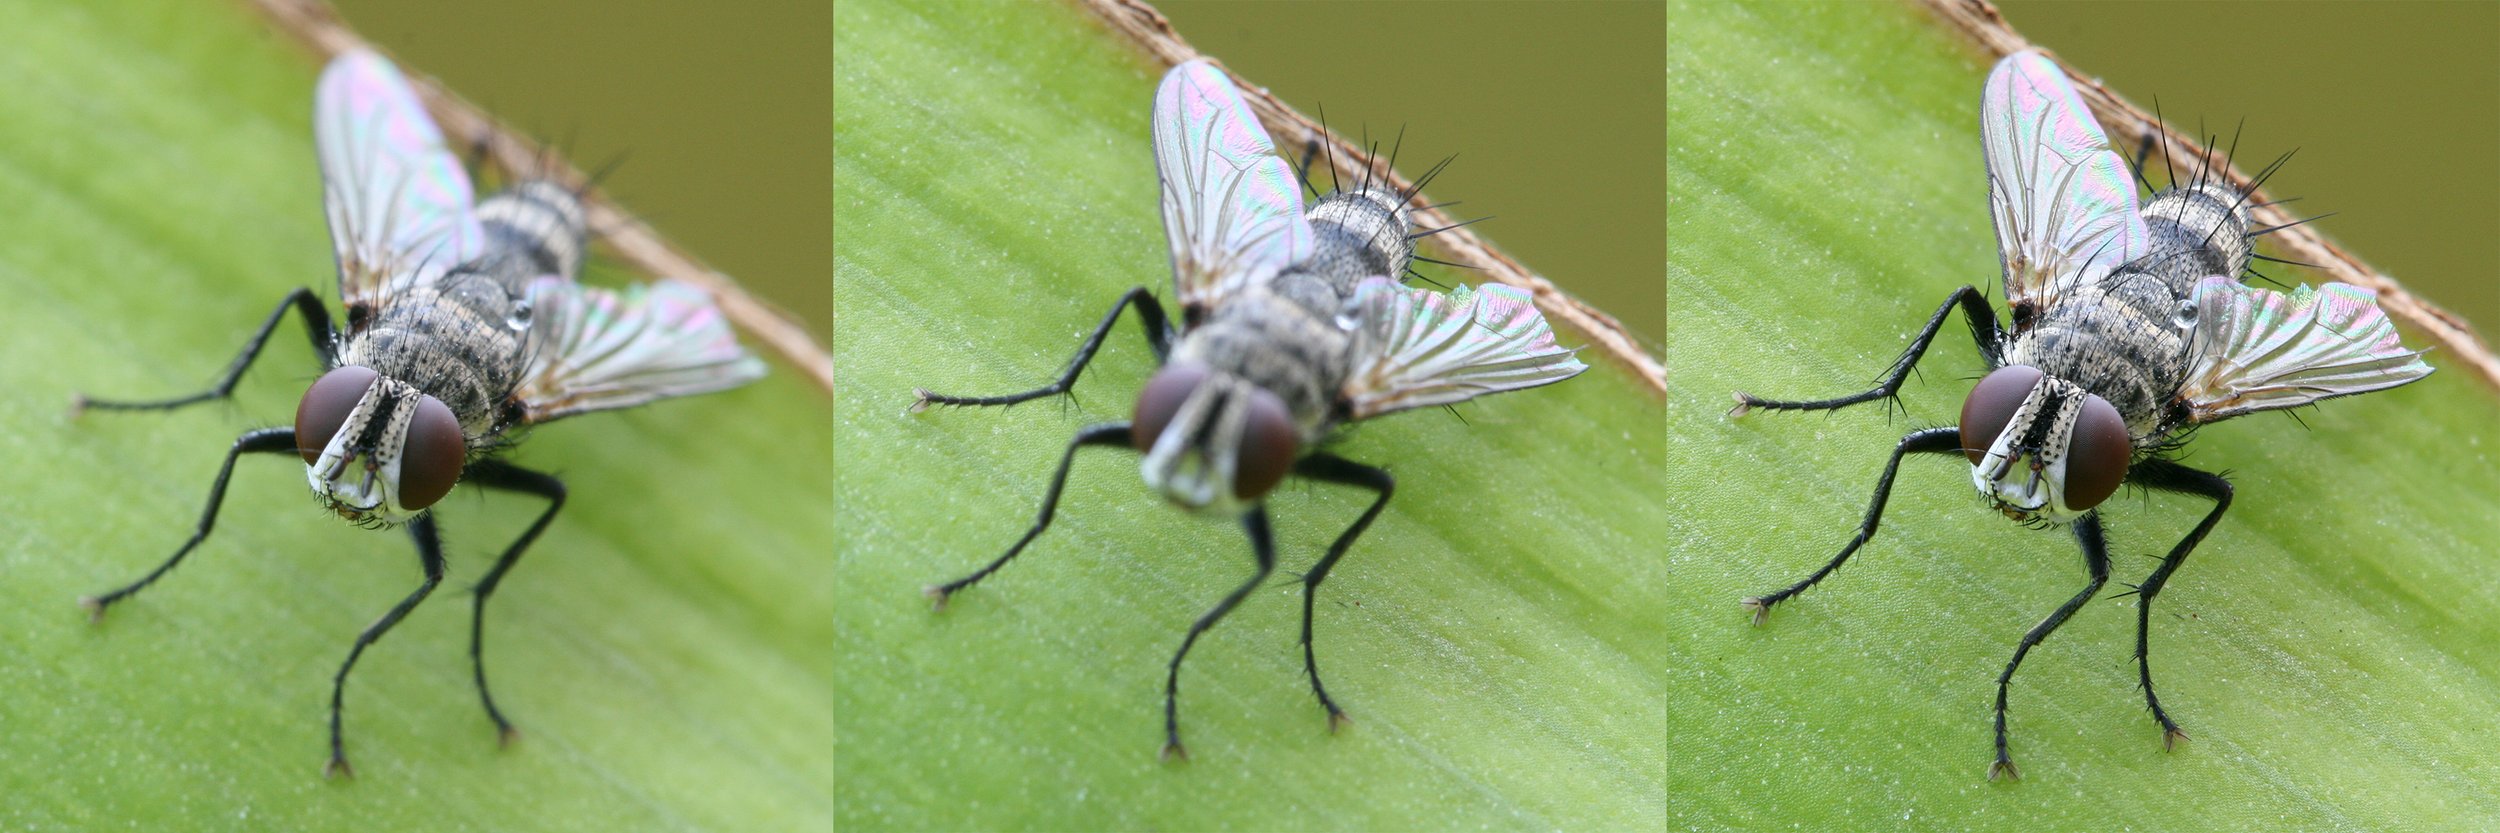
Muhammad Mahdi Karim, CC BY-SA 3.0, via Wikimedia CommonsFocus Stacking
Use a small aperture for a deep depth of field, and then take multiple shots focusing at different distances. Combine these shots in post-processing to achieve a sharp image throughout.
Focus stacking is a digital image processing technique used in photography to achieve a greater depth of field than what is possible with a single exposure. This method is particularly useful in macro photography or any situation where capturing a wide depth of field is challenging due to the limitations of the camera's optics.
Here's how focus stacking works:
Capture Multiple Images: Take a series of photographs of the same scene, each with a different focus point. These shots should cover the entire depth of the subject from the nearest to the farthest point.
Software Processing: Use image editing software, such as Adobe Photoshop or specialized focus stacking applications, to align and combine the in-focus portions of each image into a single composite photograph.
Blending and Sharpness: The software analyzes each image and selects the sharpest areas, blending them together to create a final image where the entire subject is in focus
Focus stacking is beneficial in situations where achieving a deep depth of field with a single exposure is challenging due to factors like a close subject distance, the use of a wide aperture, or limitations in the camera's optics. It is commonly employed in macro photography to capture intricate details while maintaining overall sharpness throughout the subject.
This technique allows photographers to overcome the inherent limitations of depth of field in photography and produce images with a level of detail and clarity that might not be achievable in a single shot.